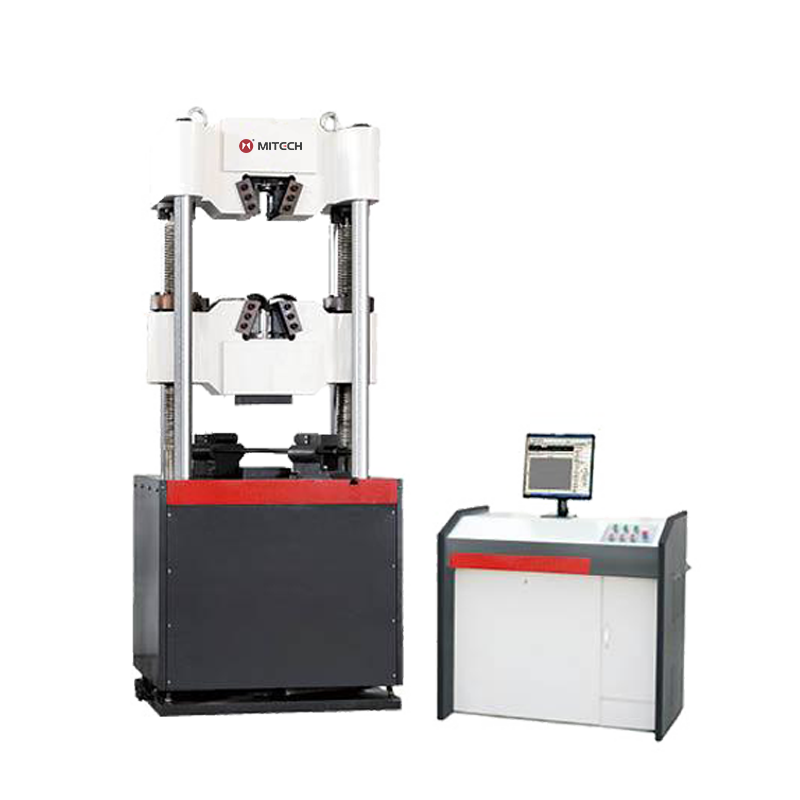


Mitech MAW-600 Micro Control Series Hydraulic Univ
Mitech
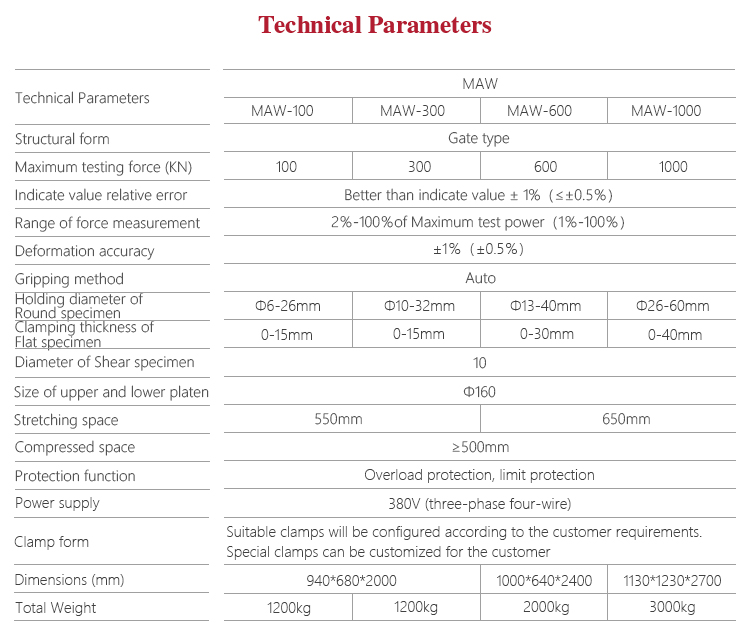
Better than indicate value ± 1%(≤±0.5%)
2000kg
1000*640*2400
80*80*200cm, 120*75*140cm
1300kg, 1500kg, 2000kg
Product
 Overview
 Graphic
 Technical
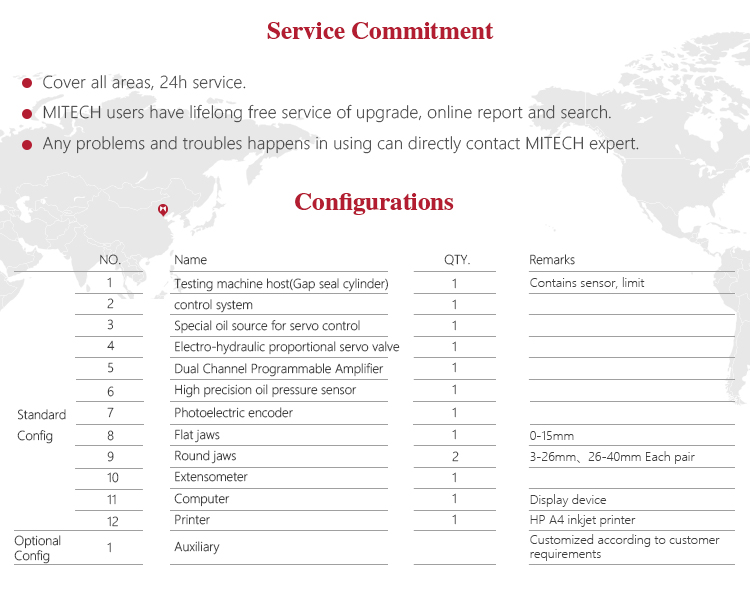
 Configuration
 Related
Product
- Overview
- Graphic
- Technical
- Configuration
- Related
-
 Product Overview
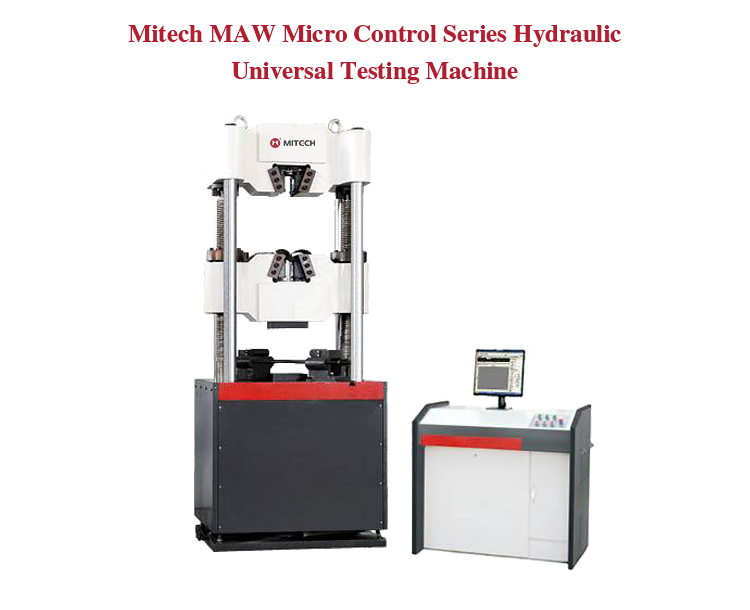
Mitech MAW micro control series hydraulic universal testing machine , can conduct mechanical properties tests for metallic, non-metallic and composite materials including stretching, compression, bending, cutting, stripping, tearing and so on ,through controlling the high-pressure pump to drive the screw movement and equipped with the corresponding auxiliary. It uses manual and electro-hydraulic servo dual control mode, high-precision gap sealed cylinder, digital processing, closed-loop control technology, which has stable property, powerful function, accurate data processing, solid and simple structure, high reliability, simple performance, friendly interface. This product can be widely used in areas such as metallic and non-metallic processing industry, quality testing in quality inspection departments, scientific research in higher education institutions , which is a necessary professional precision testing equipment to improve production efficiency and save production costs
 Function & application
l Quality control link of Metal processing manufacturing
l Quality control link of nonmetal manufacturing industry
l Teaching experiment of scientific research in Institutions of higher learning
l Material analysis test of scientific research institutions
l Quality inspection link of Quality inspection department
 Working Principle
The testing machine is the product of combing the testing machine technology with the mechanical transmission technology, the sensor technology, the automation control technology and so on, which is composed of the drive system, the control system, the measurement system . The driving system is mainly used for the movement of the beam of the testing machine through the control valve. The control system regulate the testing machine by the console , getting the state of the test machine and the test parameters through the display screen. The measuring system can conduct the measurement of force , deformation and beam displacement using the sensor, signal amplifiers, photoelectric encoders and data processing systems. This machine can conduct the mechanical performance testing of the material pull, pressure, bending and so on through the coordination of the drive system, control system, measurement system and other subsystems .
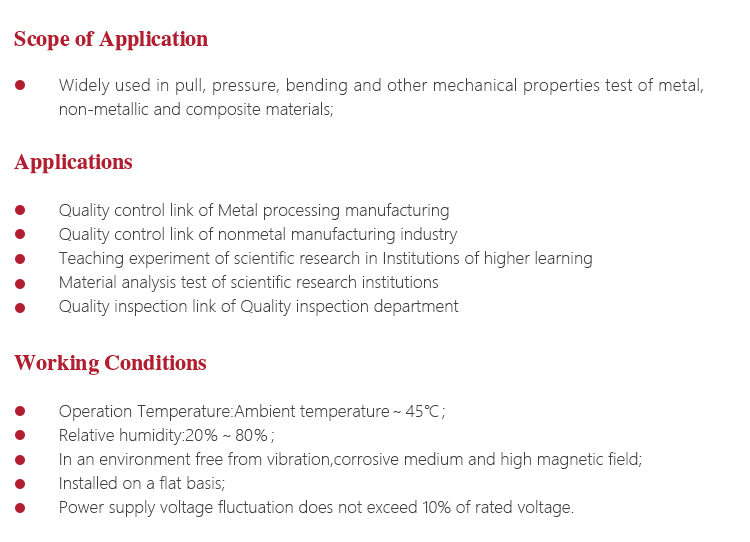
 Working Conditions
 Instrument Features
l Widely used in metallic and non-metallic processing industry, quality testing in quality inspection departments , scientific research in higher education institutions and other fields;
l Using computer control all-digital wide-frequency electro-hydraulic digital valve drive precision hydraulic cylinder to conduct a variety of modes of automatic control of the test force, displacement, deformation ;
l Integrated oil source design makes the whole structure more compact and reasonable, reducing the area;
l Upper and lower jaws for the fully open structure, and the use of automatic hydraulic clamping system, easy loading and unloading samples, good stability;
l Having functions of displaying test force, testing force peak, testing force rate and others;
l Having functions of testing force clear, peak hold, parameter settings, regardless of the whole file value measurement, calibration and fine tuning and others;
l Using 5000-line optoelectronic encoder, with relative high accuracy of displacement;
l Using high precision and high stability sensor, with high precision measurement and amplification system to ensure that the test force of high precision;
l Built-in controller to ensure that the test machine can be specimen deformation, test force and displacement of the closed-loop control;
l Having a limit protection function, arrived at the limit after the automatic shutdown, to prevent the collision in the middle of the beam caused by overload or even damage to the sensor;
l A variety of customization, to meet the needs of a variety of materials testing;
l PCI-based built-in control card, can reduce the connection, improve the test real-time control and real-time acquisition function, improve product stability;
l Can choose the load sensor or oil pressure sensor, effectively improve the test range and force value accuracy;
l Automatically according to the size of the load can be switched to the appropriate range to ensure the accuracy of measurement data;
l Zero adjustment, calibration, storage, etc. without any analog adjustment link, the control circuit is highly integrated;
l Test end, test data and test curve automatically saved for later retrieval analysis;
l Can be batch test, the same parameters of the sample only a test set;
l Consistent with GB, ISO, ASTM, DIN and other relevant domestic and foreign standards.
 Operating Method and Attentions
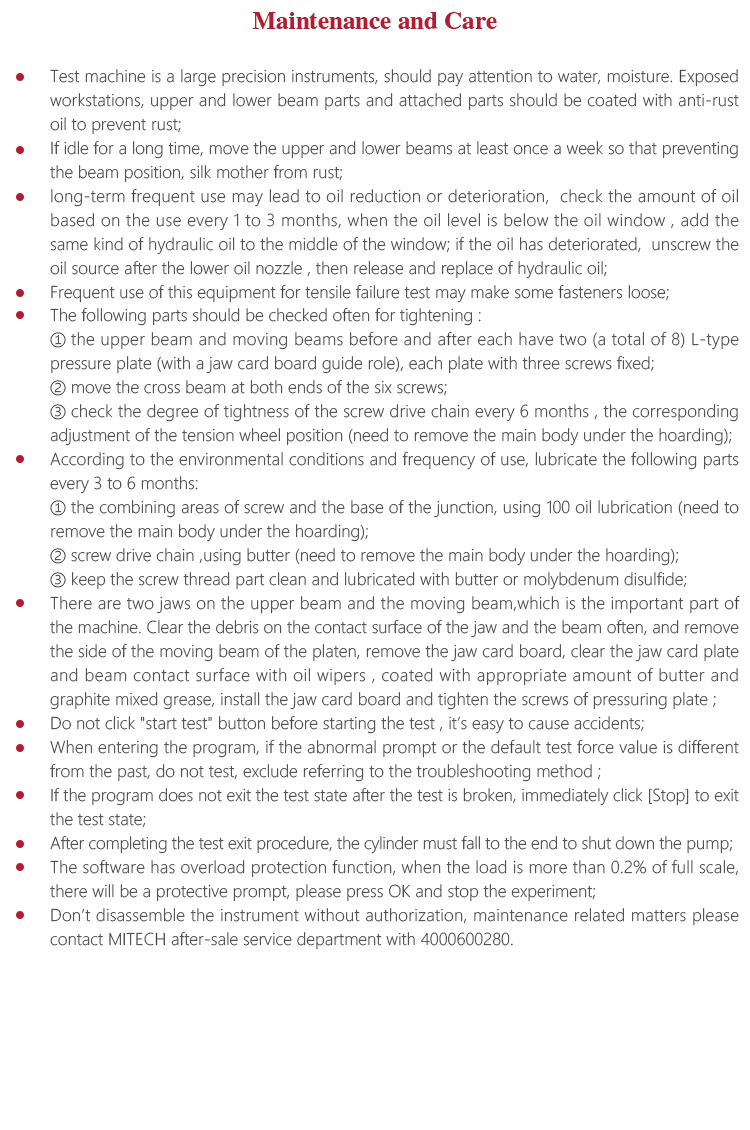
 Instrument Maintenance
<!--[if !supportLists]--> l <!--[endif]-->Test machine is a large precision instruments, should pay attention to water, moisture. Exposed workstations, upper and lower beam parts and attached parts should be coated with anti-rust oil to prevent rust;
<!--[if !supportLists]-->l <!--[endif]-->If idle for a long time, move the upper and lower beams at least once a week so that preventing the beam position, silk mother from rust;
<!--[if !supportLists]-->l <!--[endif]-->long-term frequent use may lead to oil reduction or deterioration, check the amount of oil based on the use every 1 to 3 months, when the oil level is below the oil window , add the same kind of hydraulic oil to the middle of the window; if the oil has deteriorated, unscrew the oil source after the lower oil nozzle , then release and replace of hydraulic oil;
<!--[if !supportLists]-->l <!--[endif]-->Frequent use of this equipment for tensile failure test may make some fasteners loose.
<!--[if !supportLists]-->l <!--[endif]-->The following parts should be checked often for tightening :
① the upper beam and moving beams before and after each have two (a total of 8) L-type pressure plate (with a jaw card board guide role), each plate with three screws fixed;
② move the cross beam at both ends of the six screws;
③ check the degree of tightness of the screw drive chain every 6 months , the
corresponding adjustment of the tension wheel position (need to remove the main
body under the hoarding);
<!--[if !supportLists]-->l <!--[endif]-->According to the environmental conditions and frequency of use, lubricate the following parts every 3 to 6 months:
① the combining areas of screw and the base of the junction, using 100 oil lubrication (need to remove the main body under the hoarding);
② screw drive chain ,using butter (need to remove the main body under the hoarding);
③ keep the screw thread part clean and lubricated with butter or molybdenum
disulfide;
<!--[if !supportLists]-->l <!--[endif]-->There are two jaws on the upper beam and the moving beam,which is the important part of the machine. Clear the debris on the contact surface of the jaw and the beam often, and remove the side of the moving beam of the platen, remove the jaw card board, clear the jaw card plate and beam contact surface with oil wipers , coated with appropriate amount of butter and graphite mixed grease, install the jaw card board and tighten the screws of pressuring plate ;
<!--[if !supportLists]-->l <!--[endif]-->Do not click "start test" button before starting the test , it’s easy to cause accidents;
<!--[if !supportLists]-->l <!--[endif]-->When entering the program, if the abnormal prompt or the default test force value is different from the past, do not test, exclude referring to the troubleshooting method ;
<!--[if !supportLists]-->l <!--[endif]-->If the program does not exit the test state after the test is broken, immediately click [Stop] to exit the test state;
<!--[if !supportLists]-->l <!--[endif]-->After completing the test exit procedure, the cylinder must fall to the end to shut down the pump;
<!--[if !supportLists]-->l <!--[endif]-->The software has overload protection function, when the load is more than 0.2% of full scale, there will be a protective prompt, please press OK and stop the experiment;
<!--[if !supportLists]-->l <!--[endif]-->Don’t disassemble the instrument without authorization, maintenance related matters please contact MITECH after-sale service department with 4000600280.
-

-
Structural form Gate type Maximum testing force (KN) 600 Indicate value relative error Better than indicate value ± 1%(≤±0.5%) Range of force measurement 2%-100%of Maximum test power(1%-100%) Deformation accuracy ±1%(±0.5%) Gripping method Auto Holding diameter of Round specimen Φ13-40mm Clamping thickness of Flat specimen 0-30mm Diameter of Shear specimen 10 Size of upper and lower platen Φ160 Stretching space 650mm Compressed space ≥500mm Protection function Overload protection, limit protection Power supply 380V (three-phase four-wire) Clamp form Suitable clamps will be configured according to the customer requirements. Special clamps can be cus Dimensions (mm) 1000*640*2400 Total Weight 2000kg -
-
郵箱反饋
如您在和我公司的交往中遇到問題,可通過以下方式和我們取得聯系!
您也可以撥打我們客戶服務熱線:400-0600-280


