Product
 Overview
 Graphic
 Technical
 Configuration
 Related
Product
- Overview
- Graphic
- Technical
- Configuration
- Related
-
 Product Overview
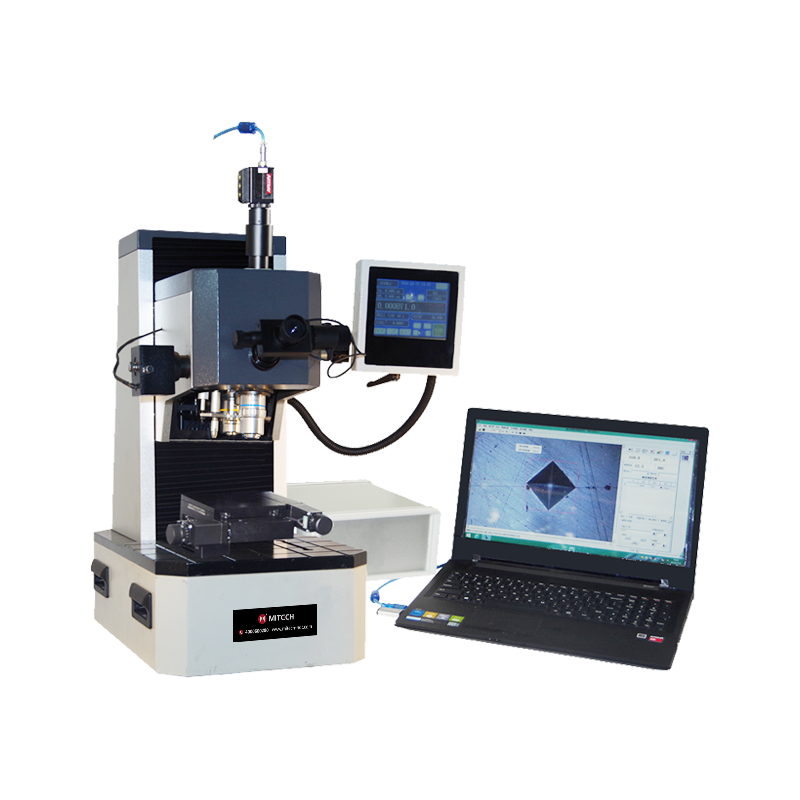
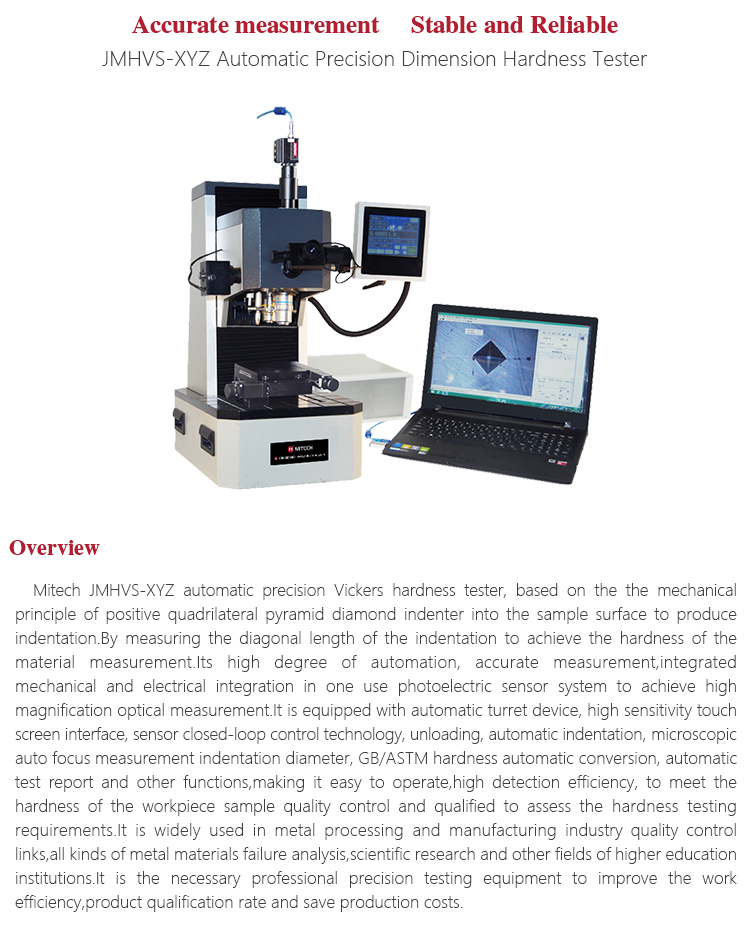
Mitech JMHVS-XYZ automatic precision Vickers hardness tester, based on the the mechanical principle of positive quadrilateral pyramid diamond indenter into the sample surface to produce indentation.By measuring the diagonal length of the indentation to achieve the hardness of the material measurement.Its high degree of automation, accurate measurement,integrated mechanical and electrical integration in one use photoelectric sensor system to achieve high magnification optical measurement.It is equipped with automatic turret device, high sensitivity touch screen interface, sensor closed-loop control technology, unloading, automatic indentation, microscopic auto focus measurement indentation diameter, GB/ASTM hardness automatic conversion, automatic test report and other functions,making it easy to operate,high detection efficiency, to meet the hardness of the workpiece sample quality control and qualified to assess the hardness testing requirements.It is widely used in metal processing and manufacturing industry quality control links,all kinds of metal materials failure analysis,scientific research and other fields of higher education institutions.It is the necessary professional precision testing equipment to improve the work efficiency,product qualification rate and save production costs.
 Function & application
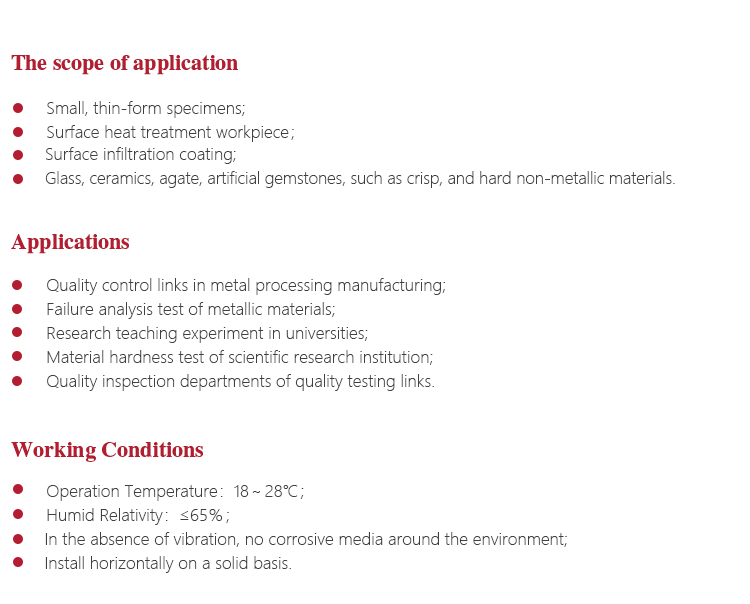
Quality control links in metal processing manufacturing;
Failure analysis test of metallic materials;
Research teaching experiment in universities;
Material hardness test of scientific research institution;
Quality inspection departments of quality testing links.
 Working Principle
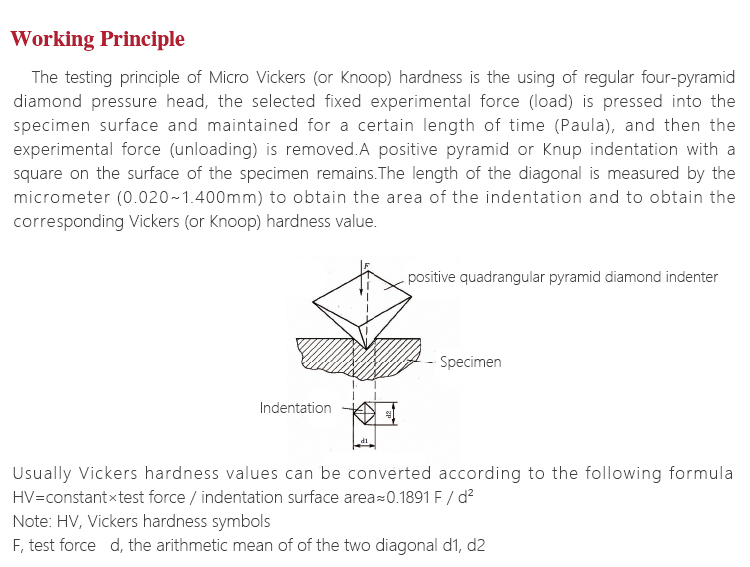
The testing principle of Micro Vickers (or Knoop) hardness is the using of regular four-pyramid diamond pressure head, the selected fixed experimental force (load) is pressed into the specimen surface and maintained for a certain length of time (Paula), and then the experimental force (unloading) is removed.A positive pyramid or Knup indentation with a square on the surface of the specimen remains.The length of the diagonal is measured by the micrometer (0.020~1.400mm) to obtain the area of the indentation and to obtain the corresponding Vickers (or Knoop) hardness value.
Usually Vickers hardness values can be converted according to the following formula:
HV = constant × test force / indentation surface area ≈0.1891 F / d2;
Note: HV: Vickers hardness symbol; F: test force (N); d: the arithmetic mean of indentation two diagonal d1, d2.
 Working Conditions
Operating temperature: 18℃~28℃;
Relative Humidity: ≤65%;
In the absence of vibration, no corrosive media around the environment;
Install horizontally on a solid basis.
 Instrument Features
It is widely applied to the Vickers hardness test of the surface (infiltration coating) of the specimen such as micro specimen, thin specimen and heat-treatment workpiece, which can meet the needs of research institutions, precision processing manufacturing and quality inspection departments, and microhardness testing;
This product is the integration of High-tech innovative products, high degree of automation, accurate measurement, suitable for measuring the demand for large or high precision high-end users;
With high rate optical sensor system and high-precision photoelectric sensor technology, the test point positioning is accurate, the test results more accurate;
Automatic closed-loop pressure sensor control system can dynamically reflect the load changes in the process of loading;
With error correction function, hardness value of the error can be corrected through the key input, more easily meet the accuracy of the test requirements;
The threshold of the automatic alarm function, suitable for batch of finished products or semi-finished products workpiece by piece inspection;
Original environment temperature real-time display function, and it can avoid the instrument working in the too high or too low temperature for a long time.Otherwise,it will lead to the increased test errors, and the instrument service life will be reduced;
Using the adjustable cooling light source measurement system, the software can control the intensity of the light source;
Automatic turret device can convert the pressure head and the microscope eyepiece, and the test efficiency is high;
Support the numerical conversion among Brinell, Vickers and other hardness standards;
Easy to operate, and it can automatically identify indentation edge, automatic removal of Burr to achieve accurate indentation measurement, synchronous display indentation diameter and hardness value, and recorded in the list;
Built-in high-speed thermal printer, so it can quickly print out the test data;
With novel shape, strong structure, the use of diamond head, rugged wear-resistant, high reliability, reading intuitive,and accurate measurement;
Using electronic automatic loading system to control the main test force, eliminating the load weights, so that the operation is more convenient;
The use of touch screen display interface, display operation integration, simple and intuitive, make the operator has no difficult and technical requirements;
Using the adjustable cooling light source measurement system,and the software can control the intensity of the light source;
Support the numerical conversion among Brinell, Vickers and other hardness standards;
Meet the standards of GBT4340.1,GBT4340.2,ASTM_E92 and other relevant standards at home and abroad.
 Operating Method and Attentions
 Instrument Maintenance
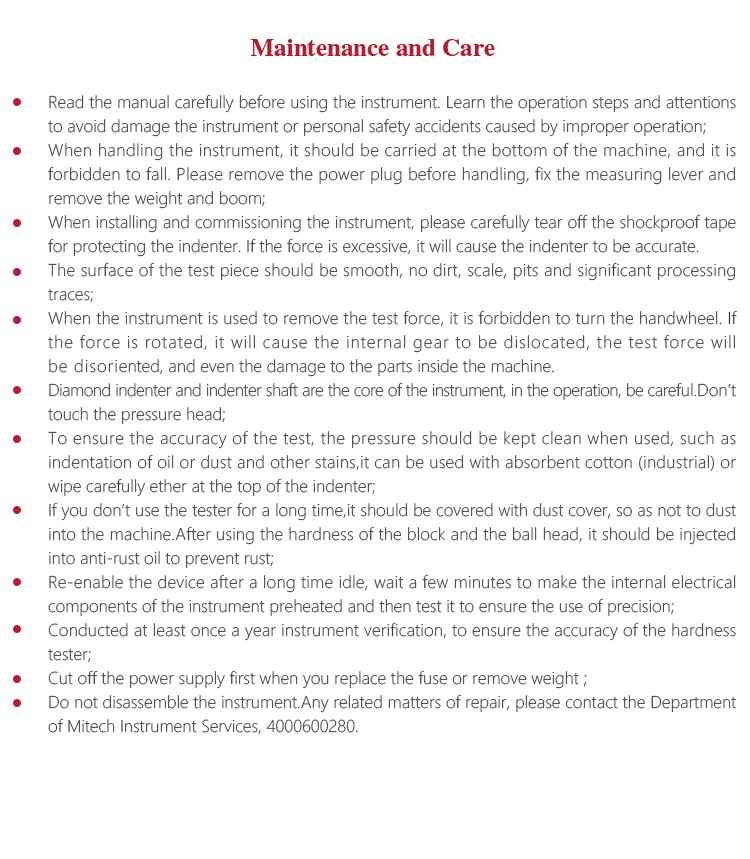
Read the manual carefully before using the instrument. Learn the operation steps and attentions to avoid damage the instrument or personal safety accidents caused by improper operation;
When handling the instrument, it should be carried at the bottom of the machine, and it is forbidden to fall. Please remove the power plug before handling, fix the measuring lever and remove the weight and boom;
When installing and commissioning the instrument, please carefully tear off the shockproof tape for protecting the indenter. If the force is excessive, it will cause the indenter to be accurate.
The surface of the test piece should be smooth, no dirt, scale, pits and significant processing traces;
When the instrument is used to remove the test force, it is forbidden to turn the handwheel. If the force is rotated, it will cause the internal gear to be dislocated, the test force will be disoriented, and even the damage to the parts inside the machine.
Diamond indenter and indenter shaft are the core of the instrument, in the operation, be careful.Don’t touch the pressure head;
To ensure the accuracy of the test, the pressure should be kept clean when used, such as indentation of oil or dust and other stains,it can be used with absorbent cotton (industrial) or wipe carefully ether at the top of the indenter;
If you don’t use the tester for a long time,it should be covered with dust cover, so as not to dust into the machine.After using the hardness of the block and the ball head, it should be injected into anti-rust oil to prevent rust;
Re-enable the device after a long time idle, wait a few minutes to make the internal electrical components of the instrument preheated and then test it to ensure the use of precision;
Conducted at least once a year instrument verification, to ensure the accuracy of the hardness tester;
Cut off the power supply first when you replace the fuse or remove weight ;
Do not disassemble the instrument.Any related matters of repair, please contact the Department of MITECH Instrument Services, 4000600280.
-


-
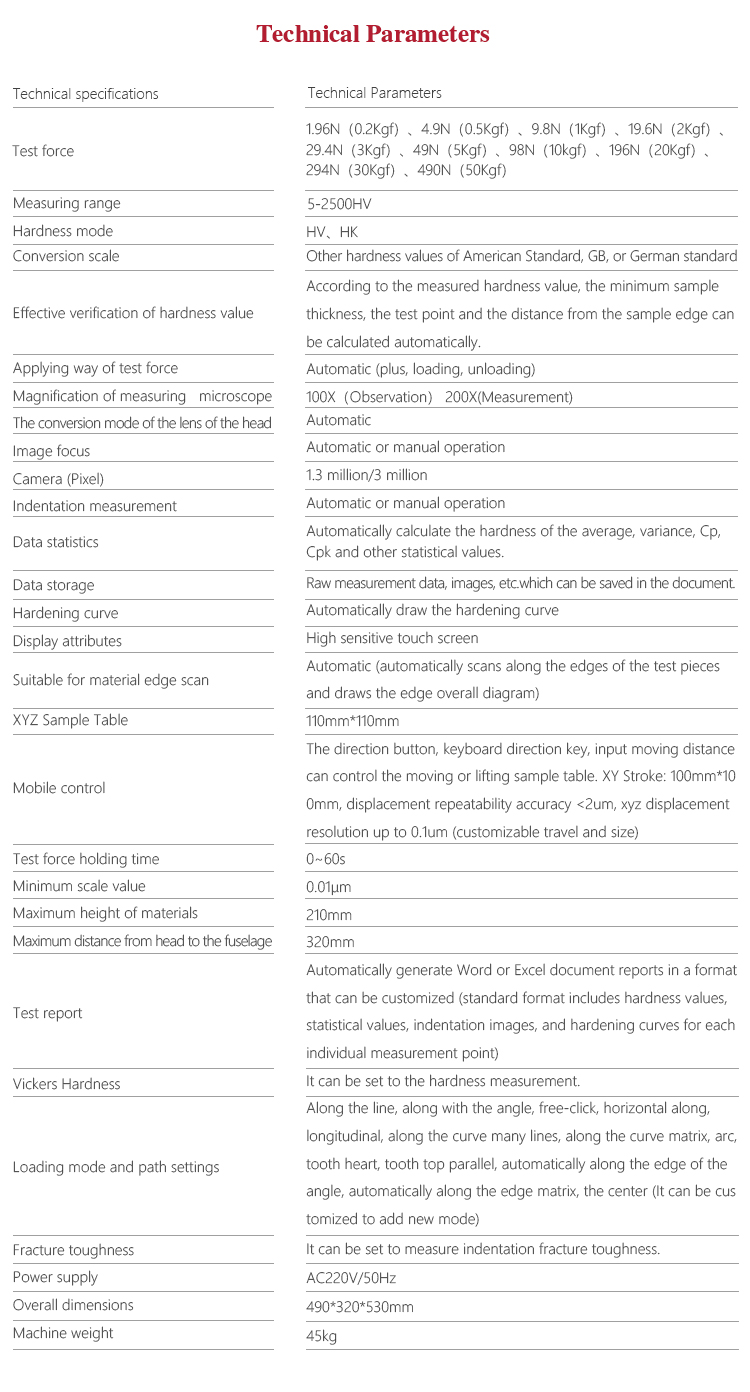
Test force 1.96N(0.2Kgf)、4.9N(0.5Kgf)、9.8N(1Kgf)、19.6N(2Kgf)、29.4N(3Kgf)、49N(5Kgf)、98N(10kgf)、196N(20Kgf)、294N( Measuring range 5-2500HV Hardness mode HV、HK Conversion scale Other hardness values of American Standard, GB, or German standard Effective verification of hardness value According to the measured hardness value, the minimum sample thickness, the test point and the dista Applying way of test force Automatic (plus, loading, unloading) Magnification of measuring microscope 100X(Observation) 200X(Measurement) The conversion mode of the lens of the head Automatic Image focus Automatic or manual operation Camera (Pixel) 1.3 million/3 million Indentation measurement Automatic or manual operation Data statistics Automatically calculate the hardness of the average, variance, Cp, Cpk and other statistical values. Data storage Raw measurement data, images, etc.which can be saved in the document. Hardening curve Automatically draw the hardening curve Display attributes High sensitive touch screen Suitable for material edge scan Automatic (automatically scans along the edges of the test pieces and draws the edge overall diagram XYZ Sample Table 110mm*110mm Mobile control The direction button, keyboard direction key, input moving distance can control the moving or liftin Measure the minimum scale value of the system 0.01μm Maximum height of applicable materials 210mm Maximum distance between head center and fuselage 320mm Test report Automatically generate Word or Excel document reports in a format that can be customized (standard f Vickers Hardness It can be set to the hardness measurement. Loading mode and path settings Along the line, along with the angle, free-click, horizontal along, longitudinal, along the curve ma Fracture toughness It can be set to measure indentation fracture toughness. Power supply AC220V/50Hz Overall dimensions 490*320*530mm Machine weight 45kg -
-
郵箱反饋
如您在和我公司的交往中遇到問題,可通過以下方式和我們取得聯系!
您也可以撥打我們客戶服務熱線:400-0600-280


